|
I haven’t written about the audition since mid-November, but I’ve been steadily working on it. I have four stories to get agent ready by February. Here’s the link for where I was back then . . . Rinda Beach - Blog - Rinda Beach And now – here’s what my stories and I have been doing since November . . . 1. The DUCK STORY went through 3 rounds of critiques and revisions. I almost sent if off for a 4th, but I spent Christmas with my Texas kids. Tomorrow I’m back to the lake and back to work. Job #1 is to finish those ducks and send them off by Friday.  It’s amazing to go through this process, to see elements of my original story in this new edition, and to see how the changes improve the plot and the characters. Drake is now Liam, but it’s a deeper change than just a name. Liam drives the action. He thinks harder, finds better ideas when the ducks challenge him. And the ducks, they’re harder to beat. The other HUGE change links Liam’s duck struggles to his sisters. The metaphor deepens the plot. I can’t wait to send this manuscript back to Lynne Marie, the Picture Book Mechanic, to see what else she suggests. She pushed me, pushed this story, and we’re better because of it. 2. My Safety Story went through 2 rounds of critiques and revisions, so far. The first round started by cutting one scene. It was easy! That means it was fat, not muscle – that’s what I call essential/nonessential parts of a story. I made the changes and sent it off to Lynne Marie. She liked the bones of the story and the character names, but Lynne Marie thought I should change the setting for the first scene. I had to think, hard, on how to make it happen. In fact, I did it last. I started with the easiest changes and moved towards the hardest ones.  When the changes were done, I listened to the story over and over again. Usually I do 3 sets of 3 listening/editing rounds, per story, per day. I do that for at least 3 days before I even consider sending it off for a critique. (Yes, I have a thing about 3’s!) Then I sent it off to Lynne Marie. She sent it back a couple days before Christmas. I saved it, and I’ll look at it this week. I’ll start by adding the notes to a fresh copy. From there, I’ll work my way through her notes, hopefully, next week. 3. My Dog Story has spent the last 2 months with Callie and her Writing Magic Critique group. It’s been through 4 rounds of critiques and 3 rounds of revisions.  In the first critique Callie suggested a name change. Names are everything in a story, for characters and titles! My own dog gave me this story idea. She was a Border Terrier named Leia, like Princess Leia from Star Wars. Her full name was Leia Millennia Beach, and yes, my kids LOVED Star Wars! They still do. Princess has been the dog’s name since I wrote the first draft back in 2012. I took a look at names over a couple days. I tried Rascal. Callie didn’t think it worked. I trust her opinions so I looked again. I picked Coco. She loved it! Woohoo! One of the most unexpected changes happened after I left Princess behind. Princess said arf, arf, but Rascal and Coco went ruff, ruff. I didn’t plan it, but arf felt wrong when I listened/edited. Ruff felt right. Editing is magic because sometimes, characters tell YOU what they want to say. It’s interesting – neither Rascal or Coco could say woof – they’re too small for that sound. The other big change was in the story mission statement. It helps me focus which road the story and its plot should take. When I wrote there’s a battle going on between Coco and her girl Marlee, it completely changed the plot. I didn’t catch it right away. Callie did! She suggested I try thinking of the story as a battle between these 2 characters. It worked! I used some of the same elements, but I turned the action into a zigzag (/\/\/\). At the end of one scene Coco’s winning, but Marlee wins the next. The best part of this new dog/girl battle is that I stuck the ending. The most important sentences/paragraphs/pages in any book, is the first, and the last. Tomorrow – the last manuscript for the challenge, plus 2 more. I started working on them in December. LOL! It’s a good thing I love editing! 4. My Nativity Story had 1 critique, from Rate Your Story (RYS). They gave it a 6 – I wanted a 1, but the comments are more helpful to me than a score.  Their only suggestion – add action. I did. Now I need to find out if it’s enough. How? I’ll send it to Callie’s Writing Magic Critique group and find out. It’s ready to send out, and the dog story is ready for more revision. The next 2 stories aren’t part of the Agent Audition challenge. They started because I decided to take a class with Callie. I thought I could finish revising my middle grade novel and do the agent audition. Then I came up with a new idea for an early chapter book. Now all I have to do is balance 6 stories?!  5. My Ant Story is 30 chapters long. Last year I finished chapter 26. When I saw this class, I decided to get a running start by going back to Chapter 1 and the revision notes Callie left for each chapter. I’ll go through those notes, make the corrections, and move forward. I haven’t started yet, but, if I read and revise chapters 1-16 by the end of January I’ll be back on track. Hopefully chapter 30 will be done by the end of February. Fingers crossed! 6. My Zoo Story is a new idea – it’s only a month old! I have the characters, the setting, but no plot – yet! I’m taking my chapter book that’s coming out in March, and moving it to the zoo.  In ZOE’S SCAVENGER HUNT FUN, Zoe is searching for points for the lake scavenger hunt Mom designed. Can she come up with enough points to beat her older siblings and win the prize? Zoo Scavenger Hunt Fun already has a problem - Zoe wants to win the hunt. I have the format – 7 chapters with 7 animals. I need to figure out what the three tries will be, how the action will rise/fall, and the animal order. I know that the challenges must grow until that 3rd try/ 6th animal, when Zoe will think winning is impossible. My plan – to work through Callie’s worksheets. They’ll help me figure out those 3 tries with 7 animals. My goal – to have the story outlined, and the first 3 chapters done by the end of January. Here’s to finding story magic at the zoo!
0 Comments
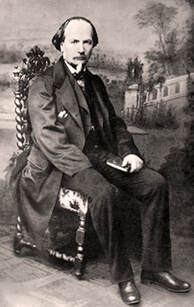
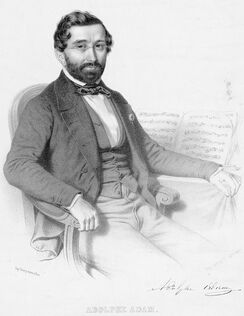
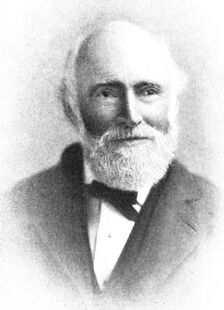
This post started with an email. Janet Campbell at elderspark.com sent me some great links to help seniors. She also asked if she could write a piece for their families who live far away. I said ABSOLUTELY! I saved Janet’s links for a later post. Here’s the piece Janet asked to write, the piece she wanted me to share.  Photo Source: Rawpixel Photo Source: Rawpixel In the past, someone who wanted to act as a caregiver for a senior relative would have to live close by. For seniors with serious medical conditions who require daily in-home care, that is still the case. But what about seniors with limited mobility who may need frequent doctor’s appointments, yet still manage to cook, clean, socialize, and take medications with little assistance? If this describes one of your parents or another relative, you may be able to handle basic caregiving duties even if you no longer live in the same area. This guide from teacher, speaker, and author Rinda Beach discusses the devices and technological support systems that will keep you updated on your loved one’s health and well-being no matter how far away you live.  1. Choose the Right Cell Phone Plan When it comes to phone plans, many carriers provide plans that cover unlimited text, talk, and data. When you’re responsible for checking in on your loved one on a regular basis, you want to know that you can stay connected without racking up any overage charges. Some seniors are very tech-savvy, but others may need assistance to choose the right cell phone and plan. You may want to spend an afternoon with your loved one and go shopping together to help them make an informed decision.  2. Alert Systems When it comes to location and medical alert systems for seniors, you have several options. Your loved one may feel safest with a wearable device that sends out an alert in the event of a medical emergency, like falling. You should ensure that any wearable device you purchase has GPS - if your loved one gets lost, this function is invaluable. Installing remote monitoring sensors in your loved one’s home can help you keep track of their daily routines and habits. According to Seniors Matter, these sensors should be placed in strategic locations around the house - for example, placing one on the refrigerator door can let you know if your loved one is eating at normal times. No matter which monitoring system you choose, you can rest assured that you will be notified if your loved one needs your help.  3. Install Security Cameras If you would feel more comfortable seeing your loved one during the day, placing a few security cameras in different locations around the house could be an option. You will have the ability to live stream the video footage on your smartphone, laptop, or tablet. While many seniors and their caregivers find that having security cameras around the house allows for peace of mind, your loved one may not be open to the idea of being recorded. Make sure to have an honest conversation with them about the pros and cons, and do not install any cameras without their permission.  4. Financial Monitoring Unfortunately, seniors are often targeted by online scammers who are hoping to make a quick buck. Kiplinger suggests helping your loved one protect their savings from scams and personally checking their accounts for any suspicious activity with a financial monitoring system. These services will generally charge a monthly fee to scan an individual’s accounts and credit reports and catch any charges that seem abnormal compared to their usual spending habits. If you are alerted about any strange purchases, and it turns out that your loved one was not responsible for the charges, you can contact the bank and credit card companies immediately to remedy the situation.  Taking on the role of caregiver can present all kinds of challenges. But modern technology is making it easier for people to ensure the safety and security of their parents and relatives as they enter their golden years, even with hundreds or even thousands of miles between them. 5. O HOLY NIGHT – This is the last Christmas song for 2020, but it was written first.  I remember hearing it in 4th grade. That’s the year I joined junior choir, and the adults sang it Christmas Eve. The organist was incredible. I’ve never forgotten that song, that night. These are the three men who created O HOLY NIGHT. Their story starts in 1843 with the renovation of an organ in Roquemaure, France. The parish priest wanted to celebrate so he asked Placide Cappea to write a poem. Adolphe Adam put it to music that same year. O HOLY NIGHT made its debut 4 years later, in 1847.
John Sullivan Dwight wrote the English version in 1855. He was a Unitarian minister, an editor for a music journal, and an abolitionist. Thanks to the 3rd verse, O HOLY NIGHT became popular with northern abolitionists, 6 years before the Civil War. 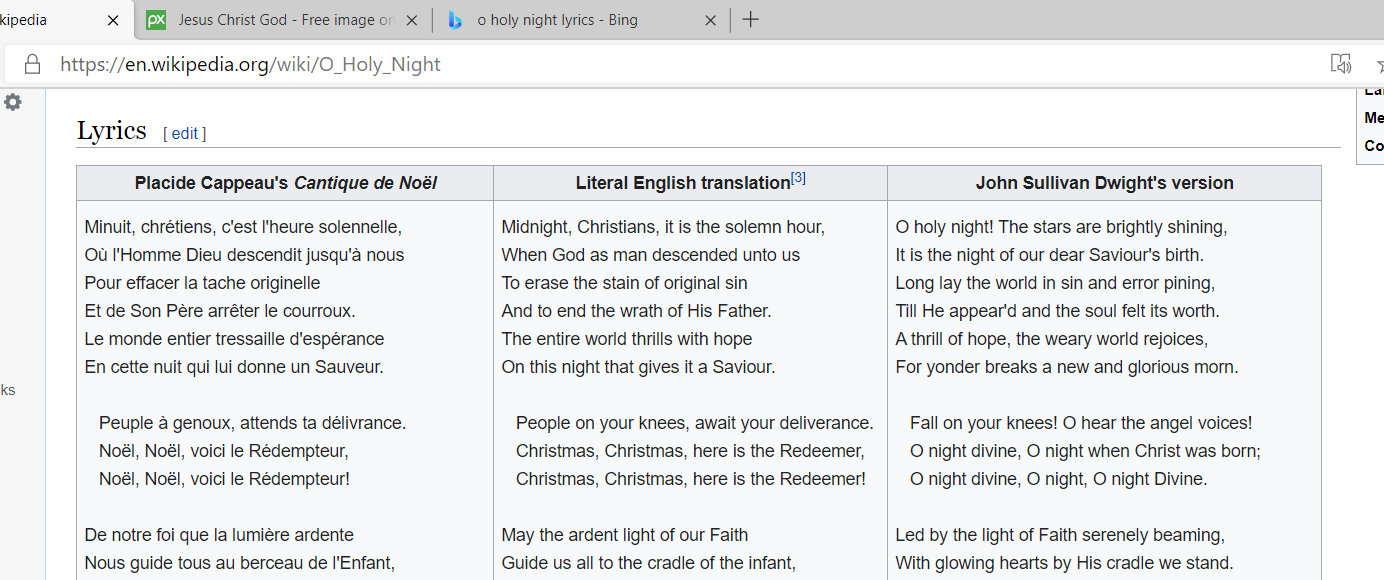 Above are 3 sets of lyrics. The first set is Placide’s version in French. His title translates to Christmas Carol. The middle one is the literal English translation. It doesn’t flow at all! The last is John’s version. The 1st verse is the one I know, but I’m glad they changed the 2nd verse.  Do you recognize Josh Groban? He recorded his version of O HOLY NIGHT in 2002. It reached #1 on Billboard’s Adult Contemporary list. My search link is for Josh’s version. Photo from 2009. By Christopher Simon from Pasadena CA, USA - Josh Groban, CC BY 2.0, https://commons.wikimedia.org/w/index.php?curid=19896028
4. MARY, DID YOU KNOW – I didn’t . . . this song took years to find its audience.  The words/ lyrics were written in 1984 by Mark Lowry, but he couldn’t find someone to write the music until 1991. That’s when he found Buddy Greene. Mark recorded it that same year with Michael English. It reached #6 on CCM Magazine’s Adult Contemporary Chart. I missed it. My car radio is set to pop music stations.  Kenny Rogers and Wynona Judd recorded it in 1997 for Kenny’s Christmas Album. It went to #55 on Billboard’s Hot Country, and I missed it again. Album Source: Fair use, https://en.wikipedia.org/w/index.php?curid=20319165  Clay Aiken’s version came out on his Christmas album in 2004. It struck home with me. I have 3 kids so I could imagine asking Mary those questions, then hearing her answers – the pride and joy, the pain and sorrow. I’m glad Mary didn’t know everything. It would have broken me. Clay’s version hit #35 on the Billboard Hot Adult Contemporary Tracks and #32 on Billboard Hot Christian songs. I think that’s when it became an American classic. Photo Source: By Judy Butler, CC BY-SA 2.5, https://en.wikipedia.org/w/index.php?curid=11404621  CeeLo Green came out with a recording in 2012. It hit #9 on Billboard Hot R&B songs and #35 on Billboard Hot Christian songs. Photo from 2008. Source: By Julio Enriquez - https://www.flickr.com/photos/julioenriquez/2621277869/, CC BY 2.0, https://commons.wikimedia.org/w/index.php?curid=14713439  This is the group, the Pentatonix. They recorded their version in 2014, and it might be the one I hear most on the radio. It debuted and peaked at #26 on the Billboard Hot 100. Their harmony, singing these words – Amazing! Photo from 2014. Source: Own work, CC BY-SA 3.0, https://commons.wikimedia.org/w/index.php?curid=33415616  This was the last recording my source listed. Jordan Smith performed it on the 2015 Finals for The Voice. It debuted and peaked at #24 on the Billboard Hot 100 chart, and #2 on the Billboard Holiday chart. Photo from 2015. Source: 2016 By DoDnewsfeatures - https://www.flickr.com/photos/dodnewsfeatures/26718732530/, CC BY 2.0, https://commons.wikimedia.org/w/index.php?curid=66102892 Click My Search Link, and you can listen to the Pentatonix, Carrie Underwood, Clay Aiken, CeeLo Green, and Mark Lowry (the one who wrote the music back in 1984).
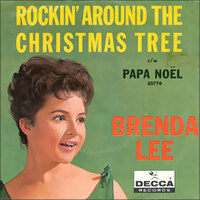
3. ROCKIN' AROUND THE CHRISTMAS TREE – Wow! You could make a great Venn Diagram comparing this song with Run Rudolph Run. They have a lot in common!  1 – They were both written by Johnny Marks. 2 – They were both released in 1958. 3. Both songs were covered by other artists, but both original versions remain popular. 4. Both were featured in Home Alone 1. 5. Both Brenda Lee and Chuck Berry are in the Rock and Roll Hall of Fame. The differences:  1 – The title and lyrics, of course! 2 – Brenda Lee sang Rockin’ Around the Christmas Tree. She recorded it at age 12, but was 13 when it came out. Rockin’ didn’t do well until Brenda became a celebrity. In 1960 it hit #14. Brenda is still known as Little Miss Dynamite because of her height – 4 feet 9 inches. She’s known best for country, but she also sang pop and rockabilly. 5 – Chuck Berry was already a star when he released Run Rudolph Run. It wasn’t re-released. In 1958 it hit #69. Chuck was 32 when it came out. He’s still known as the Father of Rock and Roll.
Record cover source: Fair use,
https://en.wikipedia.org/w/index.php?curid=34162538 Photo from 1962: By Peter Denton https://www.flickr.com/photos/peterdenton/3780886495/, CC BY-SA 2.0, https://commons.wikimedia.org/w/index.php?curid=10228352 2. RUN RUDOLPH RUN!  This one is a classic! It was released back in 1958, a year before I was born, but I don’t remember it. I discovered it watching a movie with my kids back in the 90’s. The scene with this Chuck Berry classic – two families are running through the airport trying to make their flight. The movie poster is below with the sources.  Meet Chuck Berry. This is him in 1958 when he released Run Rudolph Run. Other singers covered it in the years in- between, but the movie producers picked Chuck’s version. Can you guess the Christmas movie? Look down below for the answer.
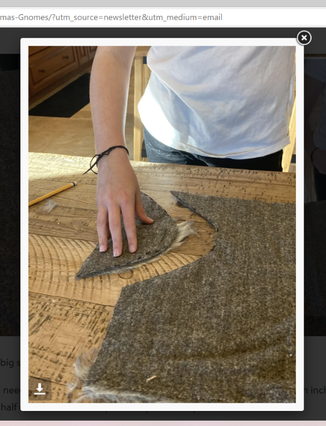
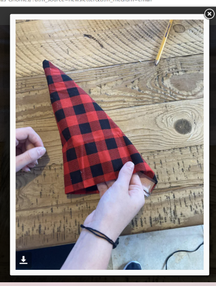
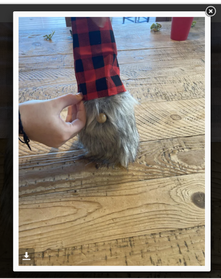
 Christmas is coming. For kids that means a week or two of vacation. I picked out 3 simple projects for families who’re looking for something fun to create. Project #1. A Christmas Gnome: I took 8 screenshots for the 4 steps in this project. Instructables has many more, that show more specific instructions. Link: Christmas Gnomes : 4 Steps (with Pictures) - Instructables 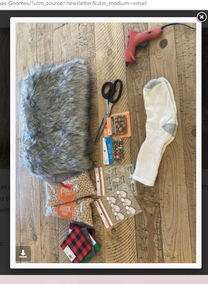 Materials: Faux fur Scrap fabric for hat Socks, pick the size your gnome should be Wooden Bead Beans or rice to fill the sock. Hot glue Rubber bands or hair ties Optional – Jingle bell and stickers to decorate the hat. You could also use a favorite Christmas pin, the jewelry kind. STEP 1 Make the body. Fill your sock with rice or beans. 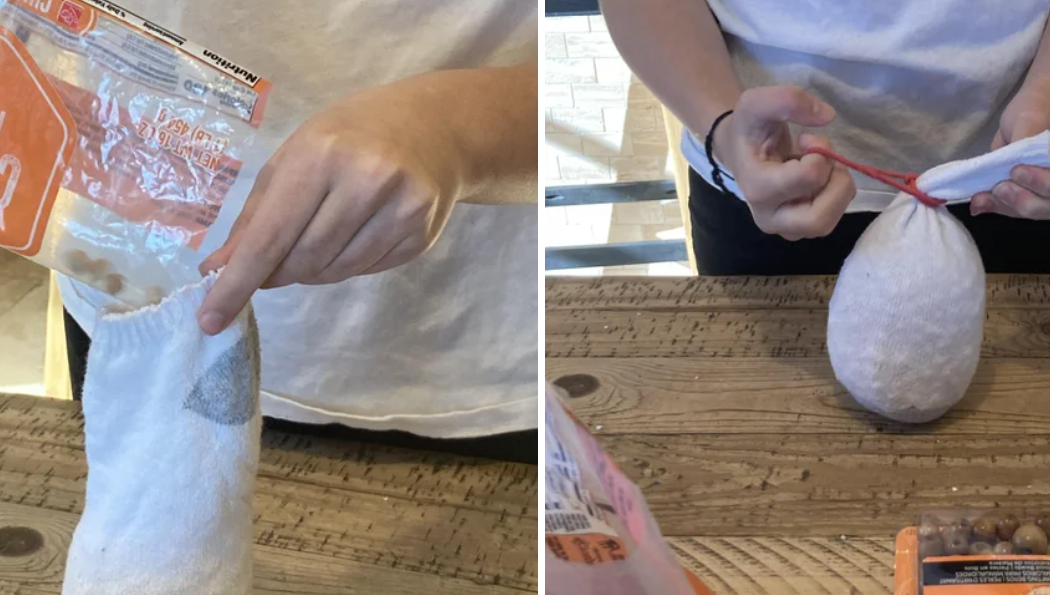 Tie it off with a rubber band or hair tie. STEP 2 Make the beard by cutting a half-moon shape out of faux fur. Cut it to fit your sock, leaving an inch of room at the top and extra fur at the bottom.
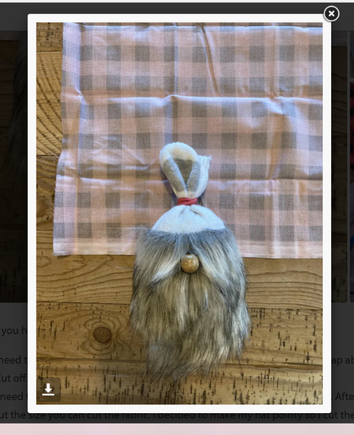
Fit your beard so that you like how it looks. Then use hot glue to hold it in place. Pick a wooden bead for the nose. Separate the beard. Then glue on the bead for the nose.
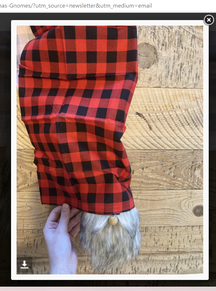
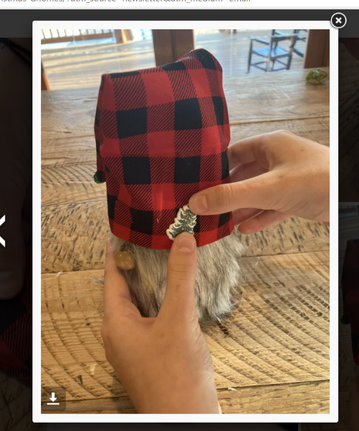
STEP 3 Make the hat by fitting the fabric to your gnome’s head. Make sure you overlap the cloth by at least half an inch. Cut away the extra fabric. In this version they used a cone. Hot glue the fabric to make the hat. Then glue it onto your gnome’s head.
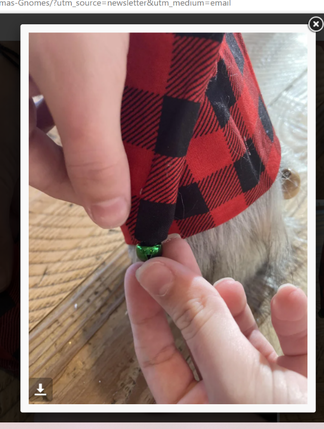
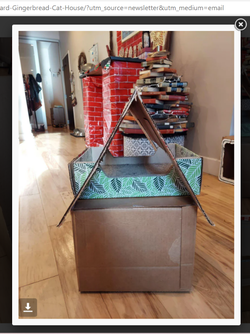
STEP 4 Optional – Accessorize your gnome. This one used a jingle bell and a sticker. You could use a pom-pom, a small Christmas pin, or whatever you’d like. 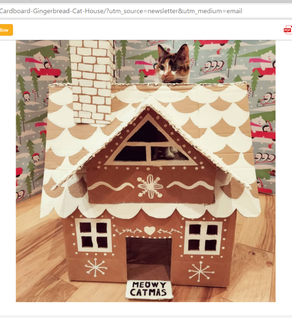 Project #2. A Gingerbread House for a Cat: I took 14 screenshots for the `12 steps in this project. Instructables has more pictures, that show more specific instructions. This house is adorable, but it’s also tricky to make. I’ll show you the basic steps. Click on the link if you want to try this project. Also, if you don’t have a cat, this would make a great doll house or any other kind of structure. Just change the the decorations or the building design to make it fit you. Link: Cardboard Gingerbread Cat House : 12 Steps (with Pictures) - Instructables 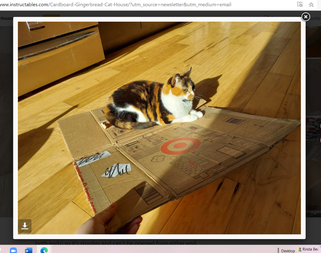 Materials: Hot glue gun & sticks Scissors 1 large cardboard box Craft knif (x-acto) 1 medium box Paintbrushes 1 small box/extra cardboard 1 cat scratcher bed (or another box) White acrylic paint
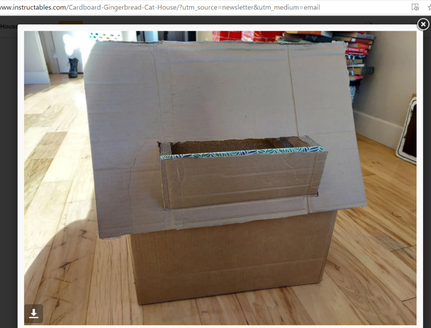
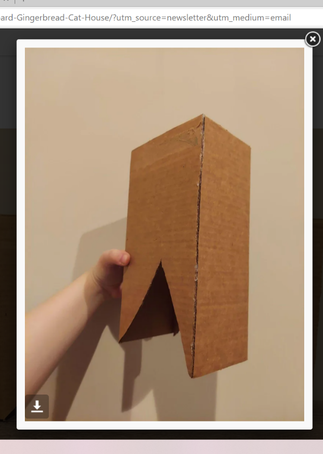
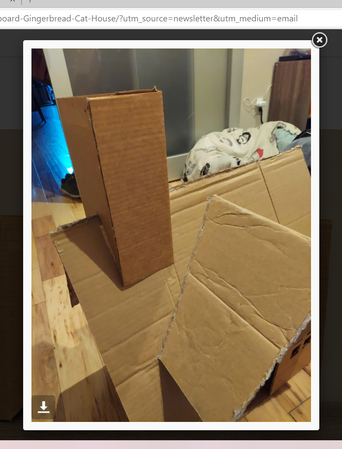
STEP 1 Build the base of the house. That’s your biggest box. STEP 2 Make the second story. That’s the cat scratcher bed, or another box Add in the roof and the gables. 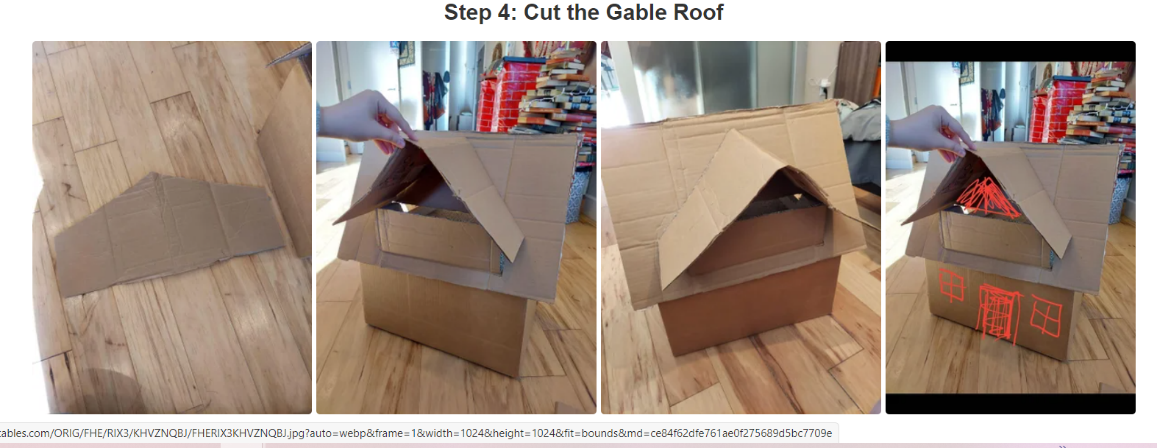 STEP 3 Instructables has this as #4, but I’m giving you bare bones to help you decide if you want to try this project. Cut out the Gable Roof, and glue it into place. 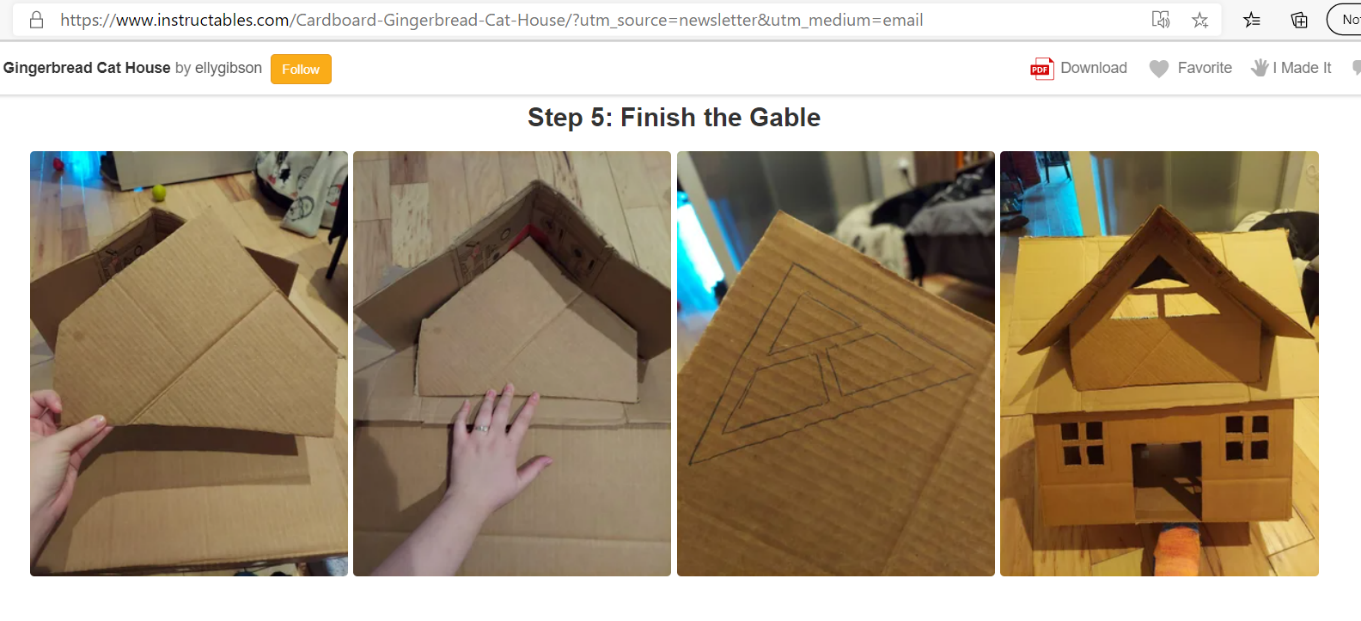 STEP 4 Finish off the gables so it looks more like a real house. Cut out the windows and the doors. Then glue the gable into place.  STEP 5 Add in reinforcements. Look for places that look droopy, or hold a lot of weight. Draw, cut out, and glue the reinforcements in place. The Instructable designer used 8-10 of them, and this is her 3rd house this fall. Reinforcements are a good thing! 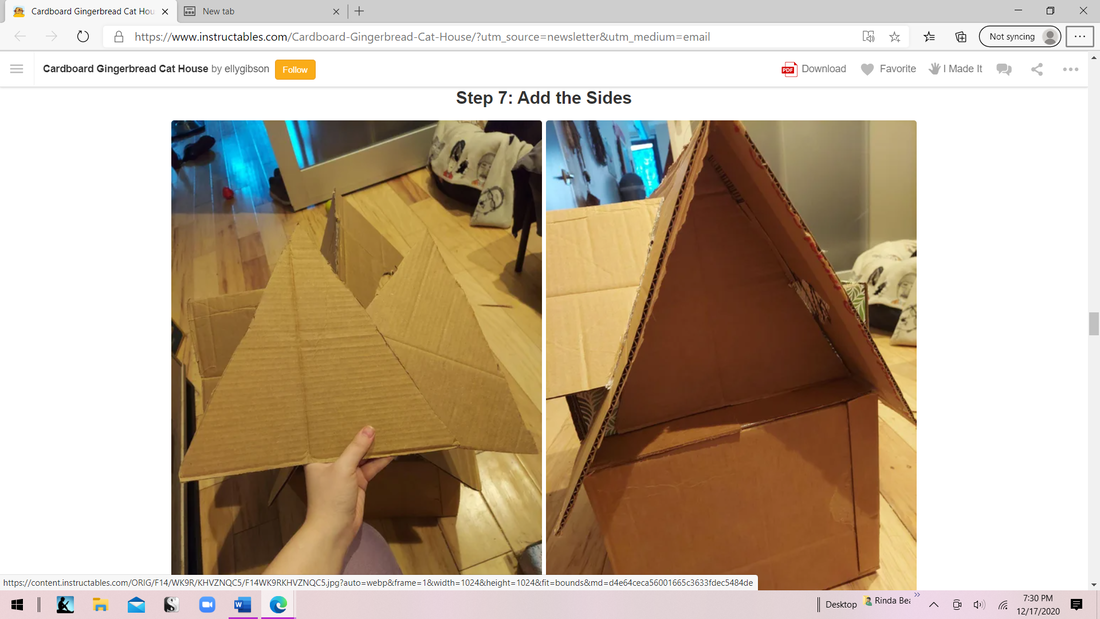 STEP 6 Add the sides – just 2 simple triangles! You might want to add in a few more reinforcers. Can you ever have too many? Really!
STEP 7 Draw, cut out, and glue the chimney together, but DON’T glue it onto the roof. You’ll want to paint everything first! 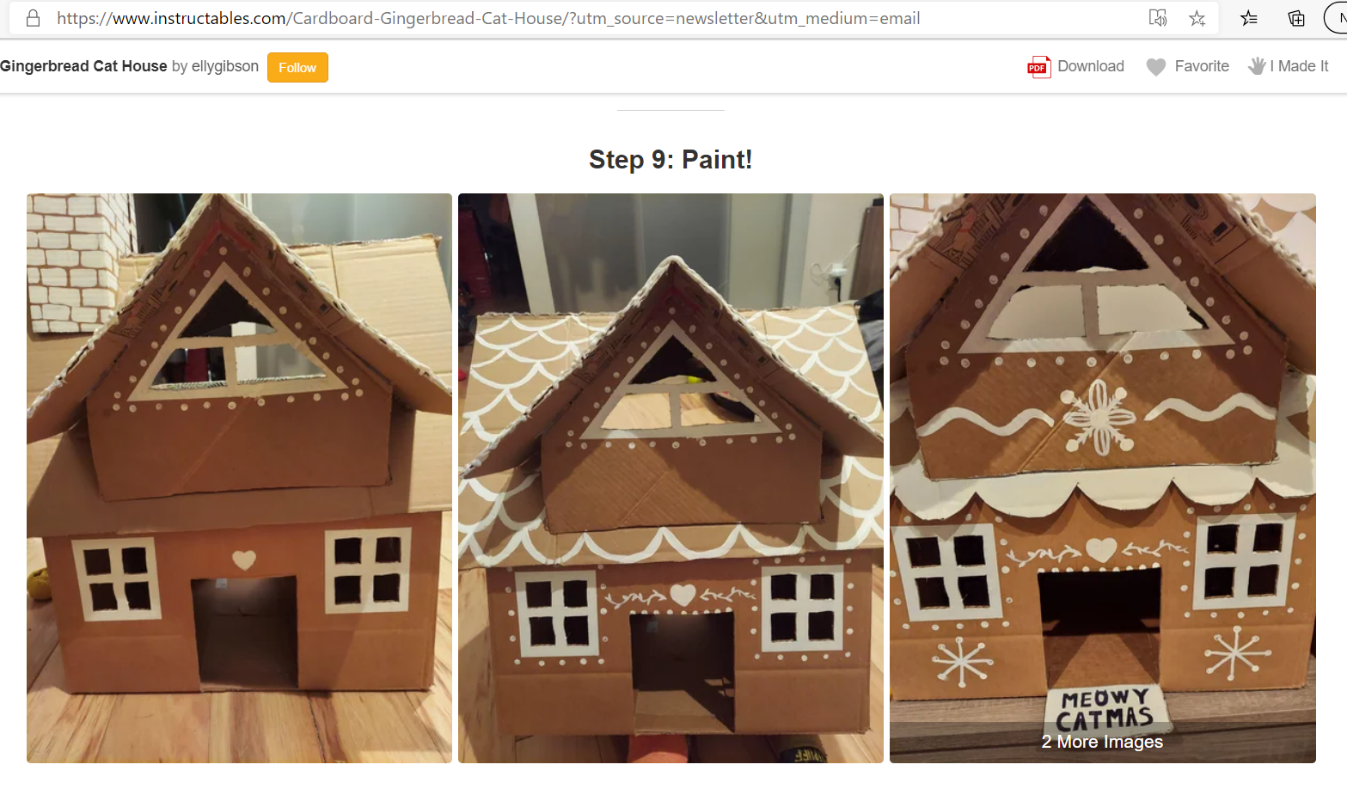 STEP 8 Paint! I would sketch these out first because I’m terrible at painting. The designer suggested painting around the windows. Add in dots and hearts, snowflakes and swirly lines, whatever you’d like to decorate your gingerbread house. Paint the shingles on the roof and bricks on the chimney. Then glue the chimney onto the roof. 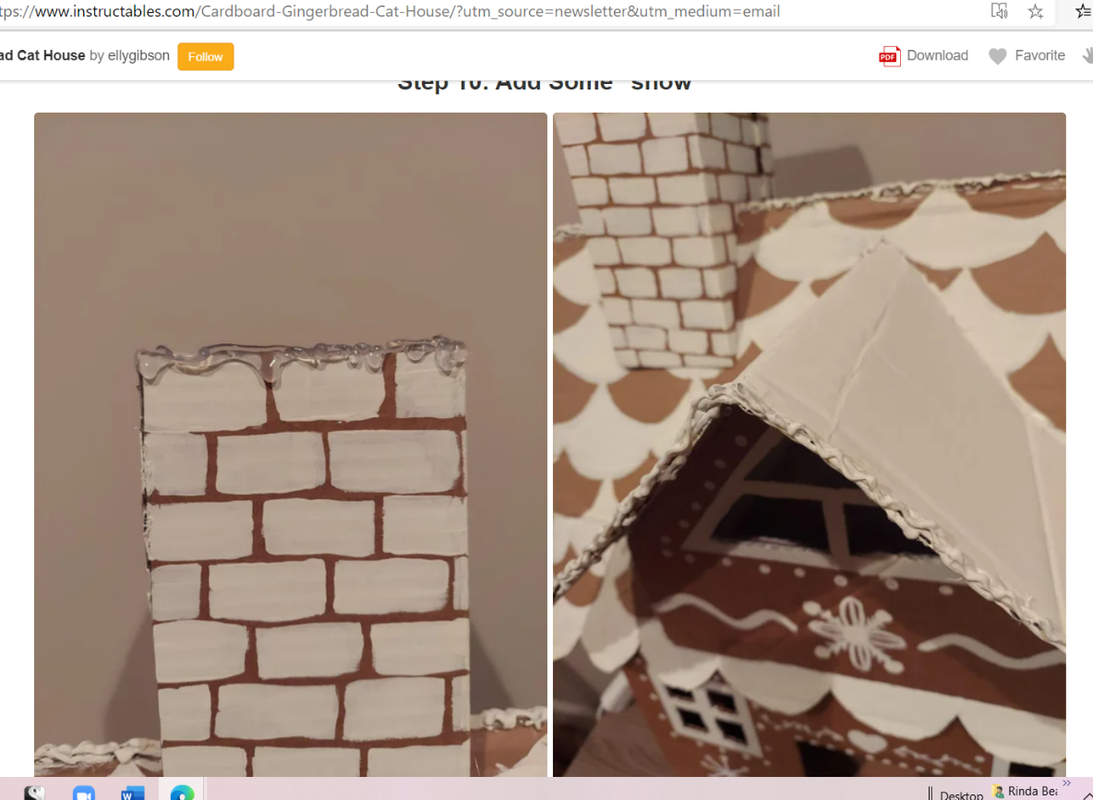 STEP 9 Add in the snow – with a glue gun! If it’s white, you’re done! If not, get out your paintbrush, and paint it white. 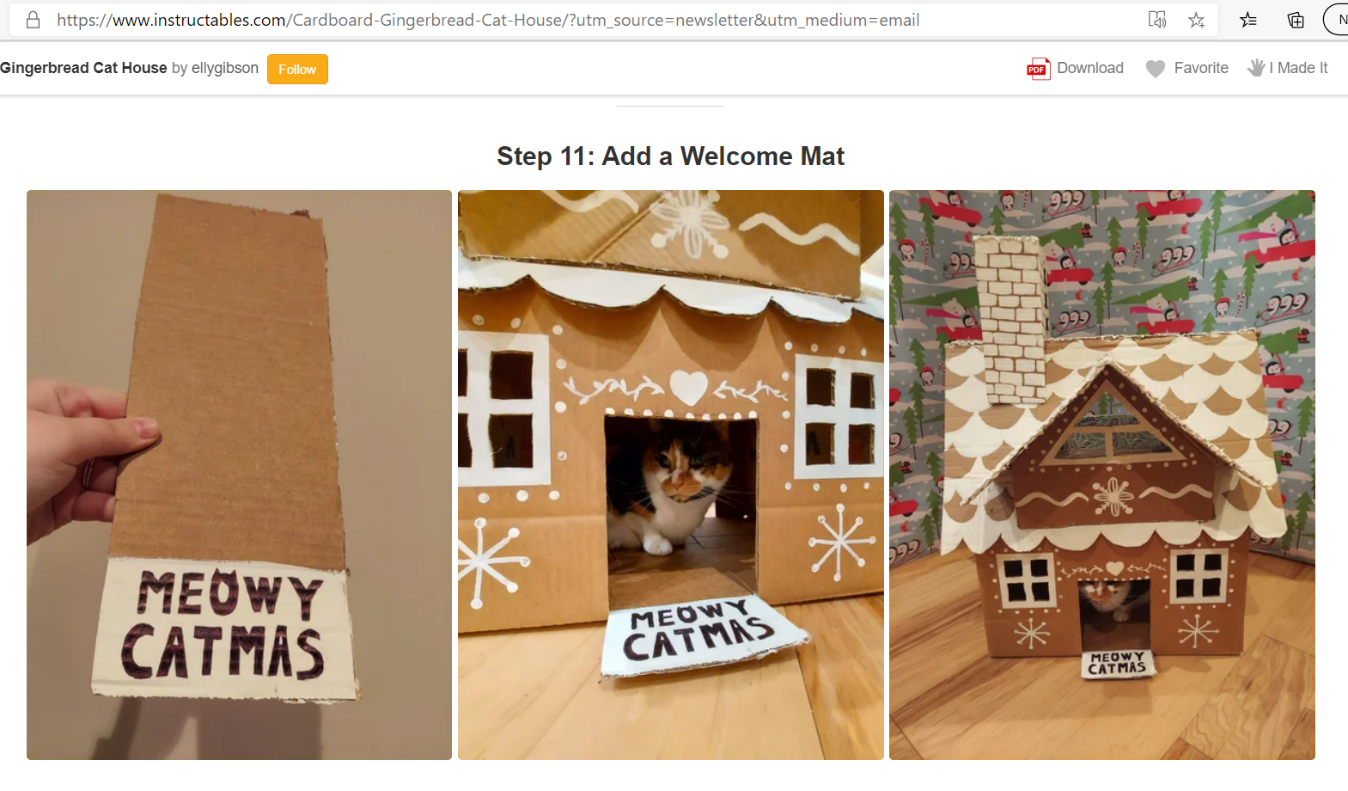 STEP 10 Optional – make a welcome mat. It should be as wide as your door. 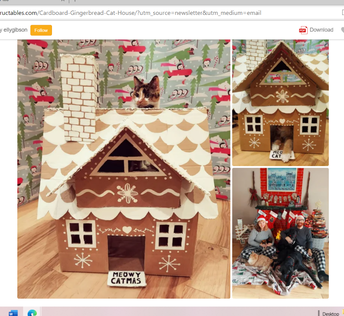 STEP 11 Enjoy! Your cat will! I didn’t know that cat’s love cardboard! The author of this Instructable has three, in different sizes, and they all love their gingerbread house! Merry Christmas! From the Cat Gingerbread House Designer 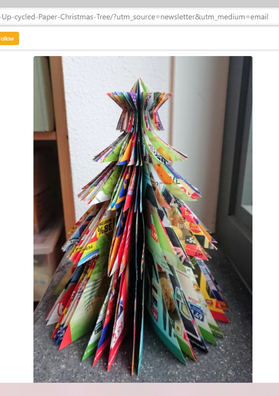 Project #3. A Simple Up-Cycled Paper Christmas Tree: This is the easiest project I picked. I took 5 screenshots for 5 steps. This one is easy-peasy! You could make it with my directions, but I included the link, just in case. Want to create a similar project? Look for a simple design, maybe from a cookie cutter. Remember – only use half the shape to make it 3D. Link: Simple Up-cycled Paper Christmas Tree🌲 : 5 Steps (with Pictures) - Instructables 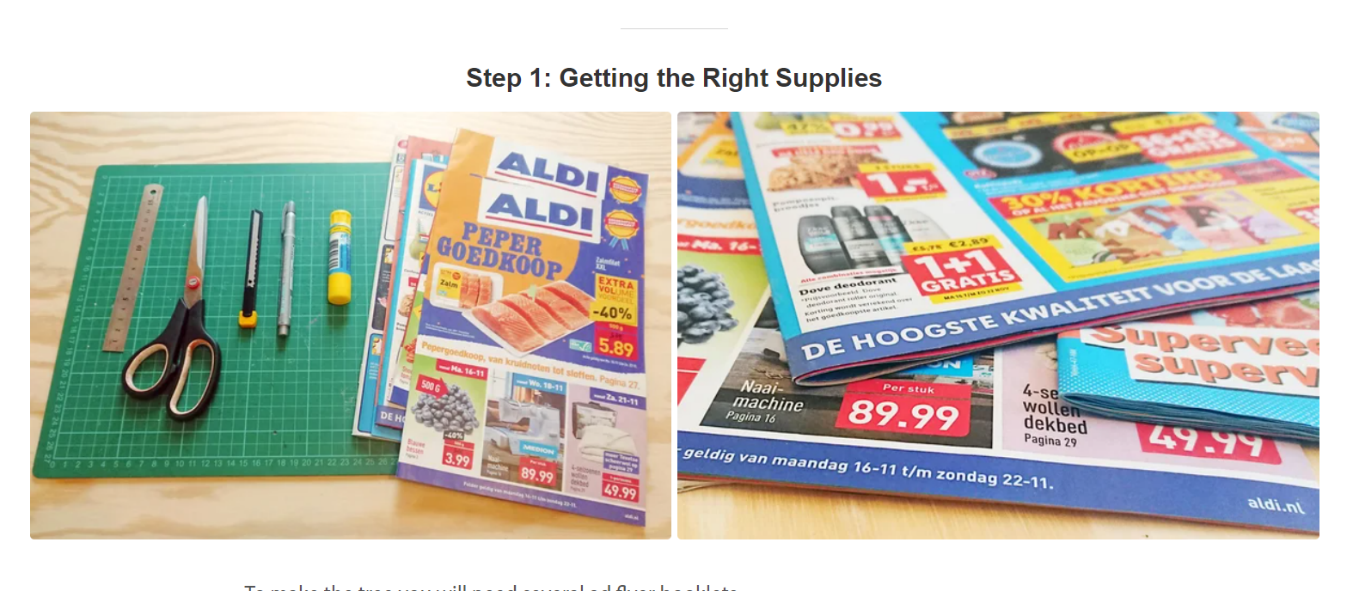 Materials: Newspaper fliers – You’ll need at least 40 pages to make your tree strong enough. This one has 110 flier pages. Scissors or craft knife (Note – the knife will give you nicer edges.) Glue sticks are great. Go easy on the glue if yours is liquid. 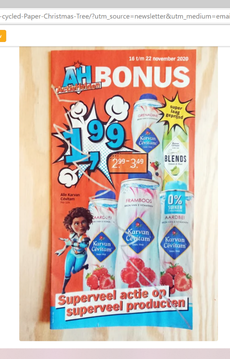 STEP 1 Decide how big your tree will be. It should be as tall as your shortest flier, and as wide as your narrowest one. Trace your tree on the booklet. This one’s traced in white. Notes – The straight edge of your tree must be on the fold. Allow at least 5mm between the tree and the star. Need a template? Click on the Instructable link. 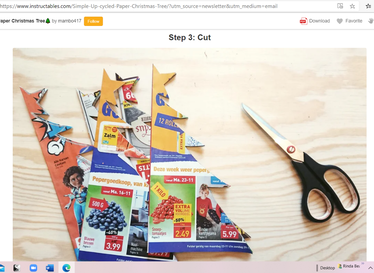 STEP 2 Cut out your first tree. Use it as a pattern for the rest of them. STEP 3 Glue two booklets together. Use the glue stick on the bottom tree. Lay the new booklet on top. Wipe off any extra glue. 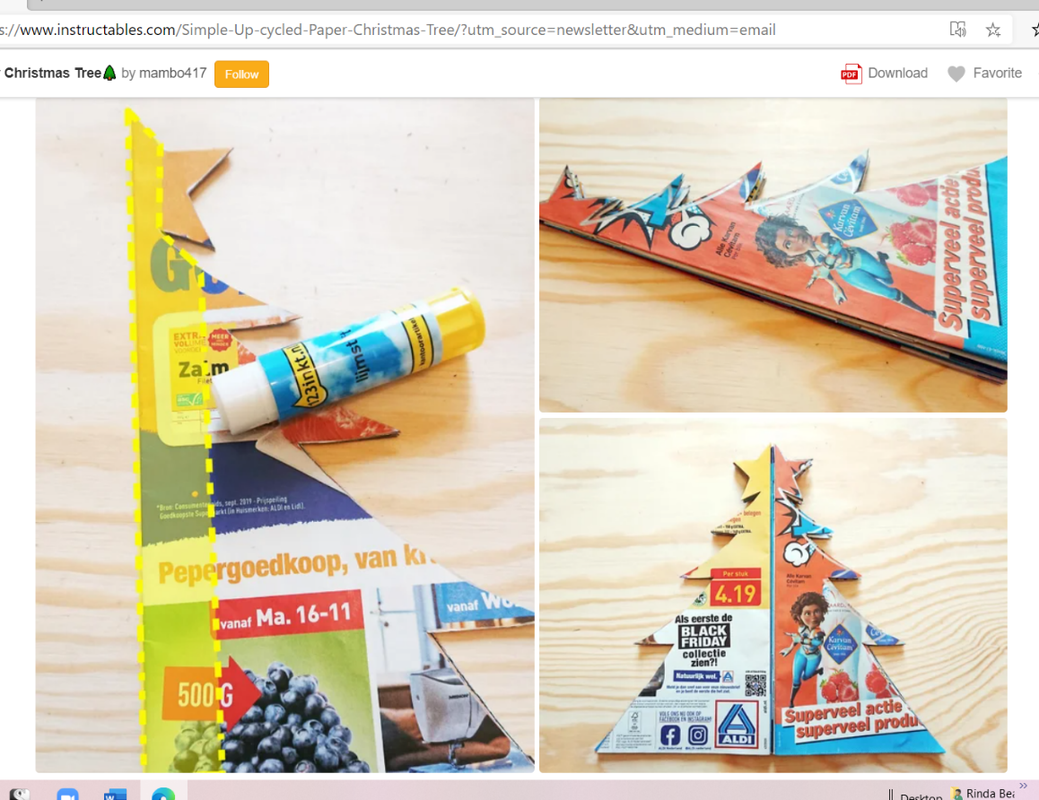 When all the booklets are glued together, open up the tree so you can see the first and the last page. Glue them together.  STEP 4 When the glue’s dry, set up your tree by spreading out the pages. Merry Christmas! Welcome to American Bandstand! This was reality TV before that word became fashionable. It aired in 1952 and was known as Bandstand. Dick Clark joined the show in 1956, as host and producer. He changed the name to American Bandstand. Bandstand featured teenagers dancing to Top 40 music. There was always one act who appeared in person. They lip-synced, and I thought they were live! Dick introduced America to acts ranging from Jerry Lee Lewis to Run DMC 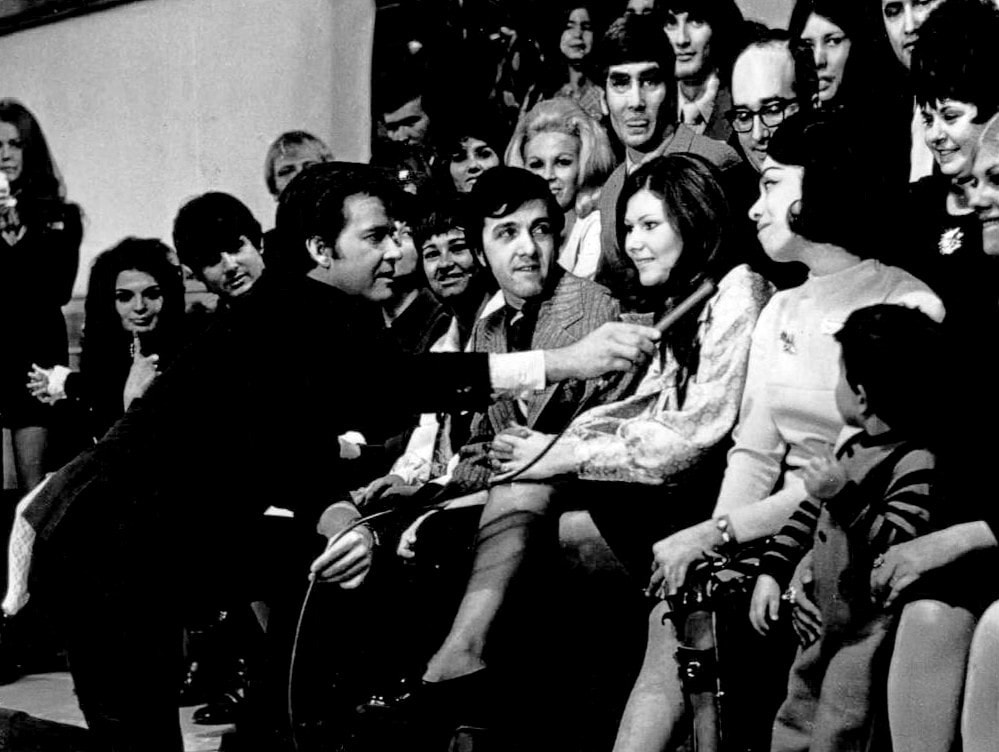 This photo is from 1970. Dick’s talking to Myrna Horowitz, one of the original dancers from the 1952 season. This was Bandstand’s 18th anniversary. American Bandstand ran from 1952 until 1989. It was a HUGE part of my life, especially when I was a teen. I would have LOVED to have been on American Bandstand. Dick Clark was known as America’s oldest teenager, but he was also a great businessman. In 1972 he started Dick Clark’s Rockin’ New Year’s Eve. Before that there was only Guy Lombardo, and he was for old people! I was 13 in 1972. Then in 1973 Dick started The American Music Awards. Before that pop music really wasn’t recognized. 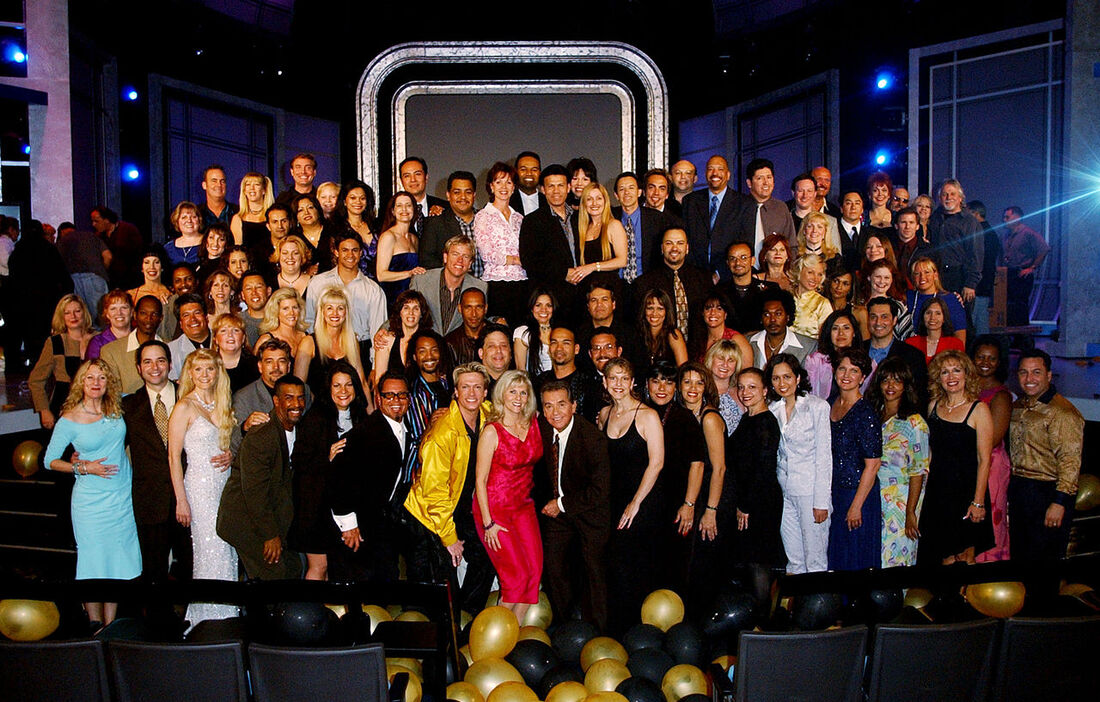 This photo was from 2002. It was American Bandstand's 50th anniversary reunion. I discovered when I was researching this post, that Dick and Ryan Seacrest had plans to revive American Bandstand in 2005. It didn’t happen – Dick had a severe stroke in late 2004. I remember praying for Dick that year. He was a big part of my life. My husband’s too . . . I didn’t know that he used to watch bandstand. Dick and American Bandstand still influence American pop culture in shows like SO YOU THINK YOU CAN DANCE and AMERICAN IDOL. Did you know these singers made their debut on Bandstand – Prince, Jackson 5, Sonny and Cher, and Aerosmith. Back in the day, you made it when you appeared on Bandstand. * * * * * * * * 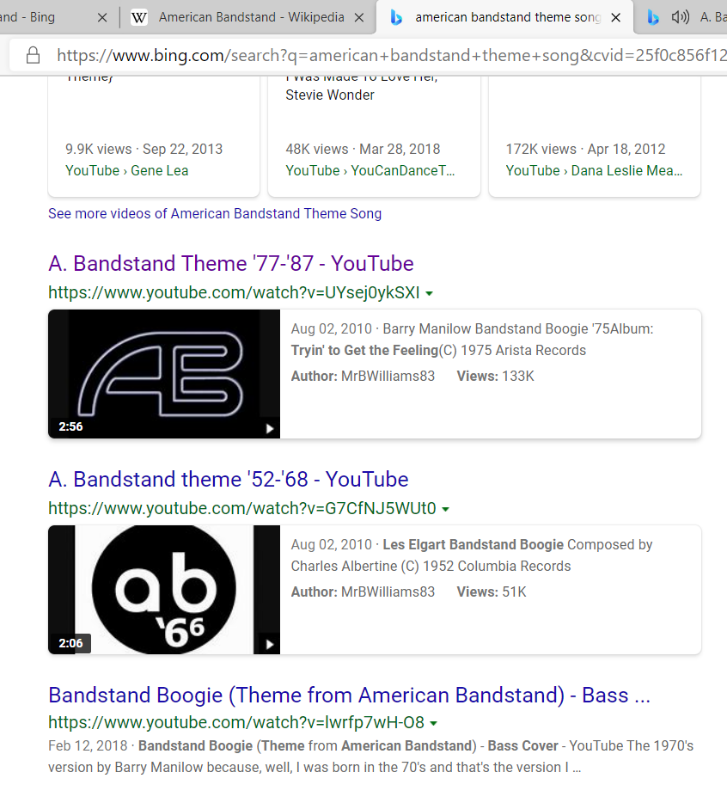 * * * * * * * *
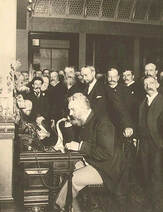
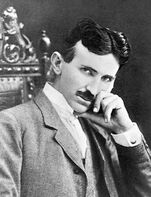
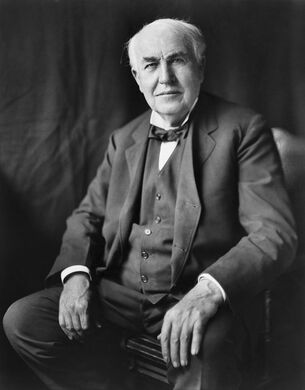
PS - Remember Three Dog Night from JOY TO THE WORLD? They were a featured act on 1973’s Rockin’ Eve. Now that you know about Bandstand, it’s time to hear the theme song. This is the screen shot from my search link. Click on the theme from 77-87. That’s the one I remember. It features the lyrics and voice of Barry Manilo. The original music is in the link below it. Which famous scientist said, “Imagination is more important than knowledge?” Albert Einstein Alexander Graham Bell Nicola Tesla Thomas Alva Edison
And the answer is . . . Albert Edison! Can you find him? Look under the photos. You’ll see each scientist’s most famous achievement.
Albert Einstein Alexander Graham Bell Nicola Tesla Thomas Alva Edison The equation E=MC2 The telephone The Tesla coil The light bulb Part 2 – Albert and I – What do we think about imagination?  My source from QuizClub cited a newspaper correspondent who interviewed Albert Einstein about how he thought. I thought he’d speak about reason, and logic, and calculations. He said, “I believe in intuitions and inspirations. I sometimes feel that I am right. I do not know that I am . . . I would have been surprised if I had been wrong.  Occasionally I’ve had those feelings, those intuitions, that I’m on the right path. It’s just a feeling. Sometimes the intuitions are right, but not always.  He also said, “I am enough of the artist to draw freely upon my imagination. Imagination is more important than knowledge. Knowledge is limited. Imagination encircles the world.”  When I was younger, I believed in the power of knowledge, maybe it was the teacher in me. But becoming a writer helped me discover that I do have an imagination. I always did. I just didn’t know that it was there. Maybe because it was easier to depend on knowledge and logic.  According to QuizClub, Einstein believed that imagination played a bigger role than knowledge. If you wanted to be creative you had to have imagination. He also believed to learn, it had to be based on experiences.  Matching learning to experiences is HUGE in teaching. It’s easier for kids to learn something new, if they can connect it to something old. When I was younger, I didn’t believe that I was creative, or that I had a great imagination, except in books. When I was reading, I could imagine myself right there, living/experiencing the story. The article also said that he wanted people to be more imaginative in developing and using ideas. Those ideas came the knowledge stored away in their head. Albert didn’t believe in accepting the status quo. He thought people should challenge, question, and push their knowledge to reach greater achievements.  I never thought of it this way, but I suppose that’s what I’ve always done, especially since I started writing. My ideas always start with an experience, whether it’s a story about a bat, or a safety drill. I look at the event/problem. As a teacher I taught problems/solutions. The hard part for me, working out the middle. That’s when I let my imagination roam. I never find the plot path right away. It takes editing and revising, over and over again before I can drive my story to that happy ending. Sometimes the ending even changes, and always for the better.  Part 3 – Finer Minds Think Imagination is More Important than Knowledge
1. Imagination Creates Knowledge  Finer Minds said that your experiences today come from yesterday’s thoughts. I wanted to know more about imagination and knowledge so I searched the internet. If you want to play soccer, you join a team and learn to play. It all starts with an idea, from your imagination. 2. Imagination Makes Life Interesting  Can you imagine life without movies, music or books? Finer Minds think it’d be dull. Me too! I typed interesting into Pixabay, and this appeared. It’s Prague, Czech Republic. What a gorgeous city!If you’re bored, you don’t sit and wait. You find something fun to do. 3. Imagination Births Innovation  Finer Minds said that inventions like cars, airplanes, and computers came from someone’s imagination. I use Tile. I’m glad it came from someone’s imagination. It helps me find my phone when it’s lost. How about you? When you have a problem, do you find a solution? I do! Necessity is the mother of invention! 4. Imagination Takes Us Places  Stuck at home? Finer Minds says things like books and movies can take you anywhere. My favorite thing about them – I can do the impossible and visit the past. Dinosaurs and Wooly Mammoths, oh my! Where would you like to go? Who would you like to meet? Find a book or movie, and off you go! 5. Imagination Gives Hope  Finer Minds says that imagination gives us hope. When things go wrong, reach for your ideas.
I had trouble writing part 3 of this post. I thought about what I really wanted to say, and the words finally came. Some problems need more time than others. Some have to be talked about. Reach for solutions, and you’ll find them. What is it? 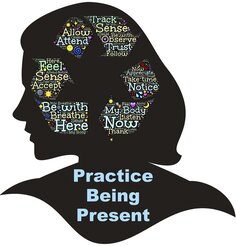 If you’re mindful, what does that mean? You’re present, not just in the room. You know what’s going on around you, inside you. No multitasking allowed! Being mindful means listening to what your head and your body say. You’re aware of your surroundings, the world around you. The most important part is recognizing your feelings. Don’t judge them. Just let them be. Source: Mindfulness: How It Helps Your Health (webmd.com) I found five exercises that will help you find your way to mindfulness. Here are my sources:  1. 25 Fun Mindfulness Activities for Children and Teens (+Tips!) (positivepsychology.com) I selected four, and they all sited Karen Young. These activities take longer, but can be modified to fit your classroom practice. 2. Karen Young. (2017). Mindfulness for children: Fun, effective ways to strengthen mind, body, spirit. Retrieved from www.heysigmund.com 3. 5 Minute Classroom Mindfulness Activities for Kids (teachstarter.com) These are shortened versions of the selected activities.  Five Mindful Excercises 1. Mindful Posing – Try striking a pose. This one might help your kids feel strong, brave, or happy. Test drive a few rounds of these. I bet your class will love them. If they do, I bet they can come up with a few new ideas for poses of their own! Source #1,2 - This illustration looks like a Superman pose, but it’s actually Wonder Woman. Stand tall, feet apart, with your hands or fists on your hips. - To make the real Superman, stand tall. Have your arms reach for the sky, like you’re ready to take flight. 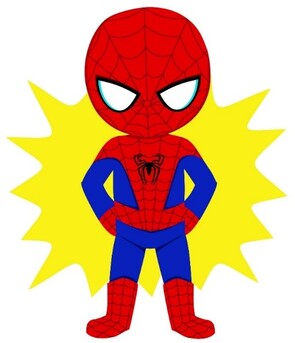 2. Spidey Senses – Kids will need their inner Spiderman for this one. They’ll need their senses to tell them about the world around them. Have them pause and focus on what their senses tell them. What can they smell, see, hear, taste, or touch? Source #1,2,3 This is a great way to encourage observation, curiosity, and living in the present! 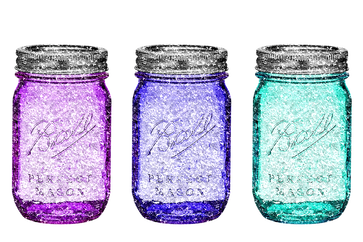 3. Mindful Jar – Another name is Glitter Bottle. The first thing to do is to make one. Here’s how . . . Fill a clear jar or bottle with water. Add glitter glue (glue & dry glitter). Put on the lid. Source #1,2,3 Part 1 – Shake up the glitter. Which emotions swirl like it? (example – anger) Connect those emotions to how they affect thoughts and decisions. Part 2 – Now watch the glitter settle. Which emotions feel like this (calming)? Connect these emotions to how they affect thoughts and decisions. Discuss how you can calm your mind (example – take deep breaths). 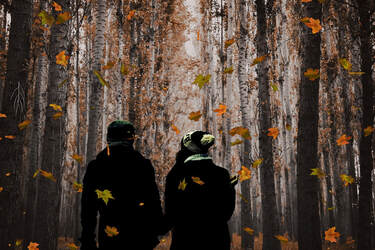 4. Mindful Walk or Safari – Take a walk, inside or out. Long or short. Keep your mind on the present. Use your five senses to find living/nonliving things in the environment. Source #1,2,3 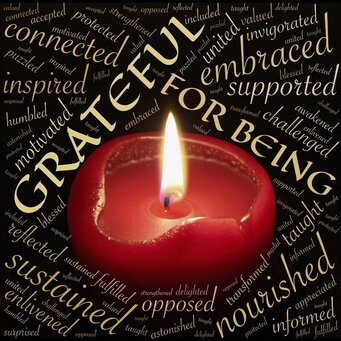 5. Gratitude – Give students time to think of things they’re grateful for. You can share them out loud. Write them down on paper. You can keep them in a journal or on a bulletin board. If you need suggestions, click on the link for Source: 3 |

AuthorWhen I write, I can only have one voice in my head, mine. A little noise is fine. But too much, or worse yet, WORDS, and I must change rooms or pull out headphones. Then I can write on! Categories
All
|


 RSS Feed