|
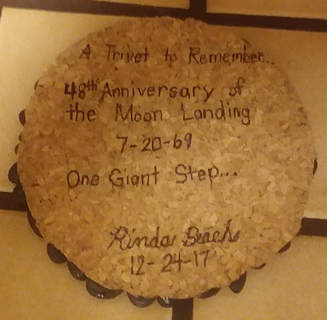
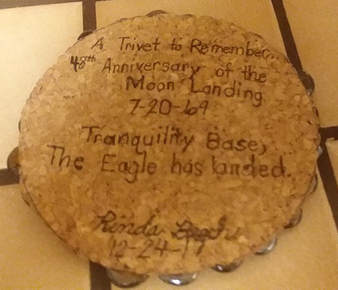
I couldn’t share last year’s projects then, but I can now. Sorry, you’ll have to wait till next December to see what I did in 2018. Last year I did a moon theme for my kids. I made these ‘trivets to remember’ the moon landing in 1969. I know, corny, but I thought it was cute. I hope my kids liked their gifts. I added in NASA t shirts and a moon statue. In Wapakoneta, an artist makes a new one each year to honor the moon landing. I love this year’s version. Now, here’s last year’s project! Project 8: You need: stones, cork, Modge Podge, a brush, and a good glue. I made a set for all 3 of my kids, one dark and one light to represent both sides of the moon. They’re just dark and light stones that I glued onto a round piece of cork. I used E6000 to hold the stones in place. Then I painted the dark stones with Modge Podge to make them shiny.
On the back I wrote a little verse about the Moon Landing, then dated and signed it. My future son-in-law joked about their ‘trivet to remember.’ I know corny, but that was exactly what I was going for.
Another pointer…proofread your words before you write them in permanent ink. I had a couple of things wrong. But if you make a mistake, laugh it off. Mistakes like these make the projects homemade and special, at least that’s what I keep telling myself, after I laugh a little.
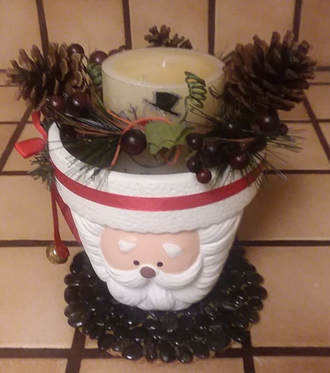
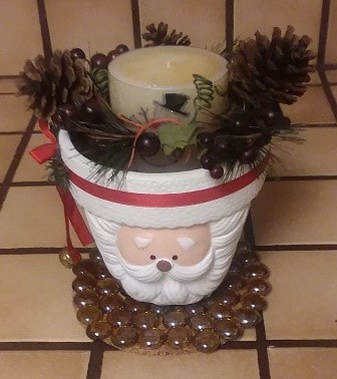
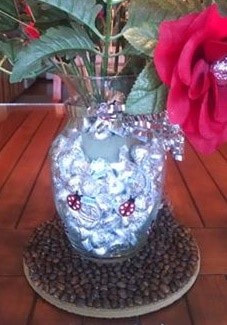
These are the final projects. I took pictures of them with my Santa vase, but my set are out all year. They sit underneath two pieces of table decorations. I also use them as trivets, not to remember, but to keep hot plates and pans off our dining room table.  1. What’s the author’s purpose? 2. What’s the main idea? 3. Which project would you try? Why? Answers are at the end of this post. Christmas is coming, and my favorite go-to gifts are photographs in one-of a kind frames. I like ideas that are simple . They don’t take forever, or cost a lot. I researched Pinterest for my first 2 projects. I tailored them to my materials, and to what I pictured for the end result. It never turns out the way I imagine, but I love the process of creating and letting a project “become.” Project 1: You need: a frame, construction paper (or cardstock), pictures, Modge Podge, and a brush. You could use this idea for a Christmas or dance program, maybe a special vacation, whatever you want to remember. Customize your frame with things you have (examples: a program, postcards, or souvenirs).
The Christmas after my father died, I wanted to do something to remember him. I wound up making 5 frames, for me, my mom, and my kids. Dad loved golf! I personalized the frame using his leftover cards. I cut them into strips and glued them to the frame with Modge Podge. I sealed it with 3 more coats. Inside I laid out the photos, tan construction strips, and his favorite poem. The glasses came later. Today it makes me happy to see Dad, and to remember him the way he was. I think he’d be happy too. Project 2: You need: a special object, a frame/shadowbox, construction paper/cardstock, ribbon/washi tape, and decoration (optional). Start with your object. Then look for things that help you remember your special day/event. Example: programs, pictures, postcards, or souvenirs.
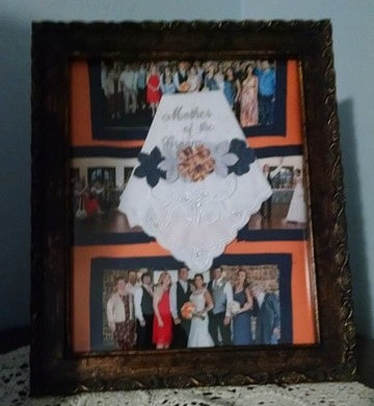
This project started with a gift handkerchief from my son’s wedding. It says “Mother of the Groom.” I didn’t want it to sit in a drawer so I found a cool frame. I picked my favorite wedding pictures, glued them on an orange background, and framed them in blue ribbon. Cloth flowers added some color. I used Modge Podge to add their program to the back. I made 3 more handkerchief frames for my mother, my mother-in-law, and my new daughter-in-law. These were simple gifts. My biggest expense was the frame, and Hobby Lobby had them for 50% off. 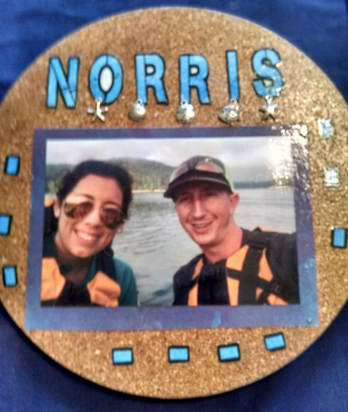 Project 3: This is last year’s project. You’ll need: cork, cardstock, Modge Podge, pictures, and lettering. Optional: nautical charms or buttons. I found lettering online and printed what I needed. I did a lake photo project for my kids. The front and back are the same, just different pictures. I started with the photos and framed them in cardstock. I printed the lettering, then moved everything around, including the charms, until I liked the layout. I glued everything down with Modge Podge, except the charms. I added 2-3 layers on top to seal and finish the project. I glued the charms on last using a stronger glue, like Gorilla or E6000. The only downside to this project is you can’t use it as a trivet for hot dishes. But, if you’re looking for an unusual frame, this is it! It’s a simple, inexpensive way to remember events like vacations or dance recitals, and it’s kid-easy to make. 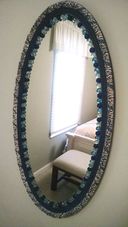 Project 4: You need: colored stones, E6000. This project started with a brand-new mirror…that dripped paint on itself on the way to the lake. I didn’t want to return it so I found a bag of dark blue, light blue, and white stones. I glued them down with E6000. Drip solved, and the mirror looks as good as new. If you have something old that needs a little freshening or updating, this is a great way to go!
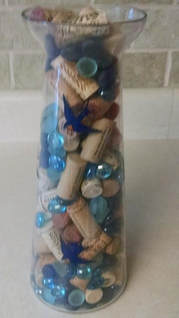
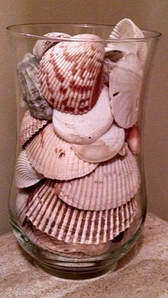
If you have a vase or container, use what’s new like stones and candles, or what’s old like seashells. Fill it with things that make you happy!
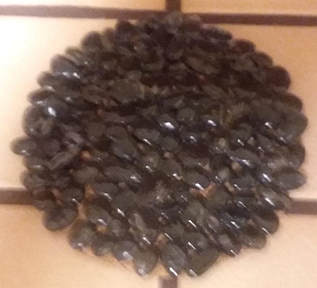
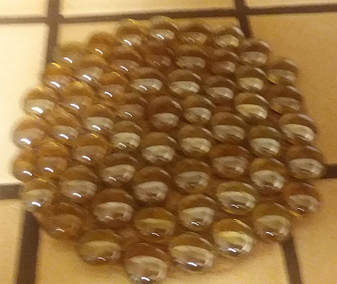
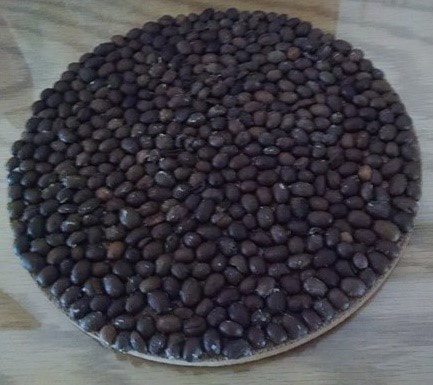
Project 7: You need: cork coffee beans, and a strong glue.
This is the same project, with coffee beans instead of stones. I hoped to get that coffee smell, but didn’t, not till my nose was right on top of those beans. I’m bringing it home to brush on a little Modge Podge. On my last project I discovered it makes things darker and shinier, and I should still be able to use it under hot dishes.  DIY Your Own Christmas Projects
1. What’s the author’s purpose? My author’s purpose was to inform/teach you how to make 7 Christmas projects. 2. What’s the main idea? Example: It’s about 7 projects and how to make them. 3. Which project would your try? Why? Example: I’d make the cork frame because it’s easy, and I want to remember my Christmas program.
0 Comments
Your comment will be posted after it is approved.
Leave a Reply. |

AuthorWhen I write, I can only have one voice in my head, mine. A little noise is fine. But too much, or worse yet, WORDS, and I must change rooms or pull out headphones. Then I can write on! Categories
All
|


 RSS Feed